

![]() Since Trygar Transportation requires PayPal to make your monthly payments, it's probably a good idea to have your own PayPal account. You don't technically need one to make your payment, since you can always pay using a Guest PayPal account, but it makes life easier to have one so you don't have to re-enter your information every month.
Since Trygar Transportation requires PayPal to make your monthly payments, it's probably a good idea to have your own PayPal account. You don't technically need one to make your payment, since you can always pay using a Guest PayPal account, but it makes life easier to have one so you don't have to re-enter your information every month.
PayPal is quick to sign up for and it's very safe and secure. PayPal is the leading online outlet for making purchases online. These days, it's owned by EBay. PayPal has plenty of fraud protection to help keep your sensitive information safe and secure. You may enjoy using PayPal so much that you end up using it for all your online purchases!
On the next several slides, we'll walk you through the basics of setting up a PayPal account. Each graphic you see during the tutorial can be clicked on and enlarged to give you a better look at what we're talking about as we go along. These pictures are linked together so if you hover over the left or right side with your mouse, you should see navigation controls pop up to take you to the next (or previous) image in the show.
Follow along closely and you should have no issues setting up your account. If you experience any difficulty you can contact Trygar Transportation and someone will be glad to try and help you out. Good luck and happy reading!
Now click the PayPal sign up button above to get started. This will open PayPal in a separate window so you can go back and forth between this tutorial and PayPal.
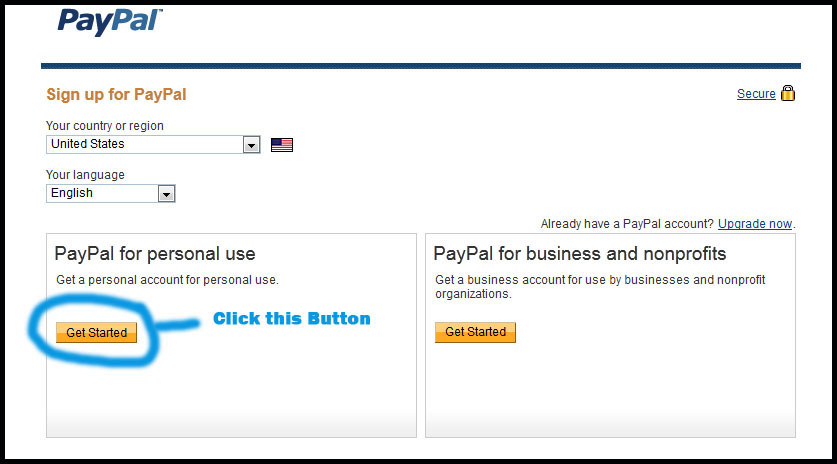 Ok so you've clicked the big sign-up button and you have PayPal ready to be signed up for, right? Good. Now under where it says "PayPal for personal use", simply click the "Get Started" button. Since you'll be primarily be making payments, it makes more sense to have a Personal account. Business accounts are more for, well, businesses. When you've clicked the button and have come to the next screen, continue on to the next slide in this tutorial.
 We've all seen these types of forms before, correct? Should be nothing hard to fill out here. There are a couple things to point out though.
First, make a definite note of the email address and password that you use to sign up. You will be using this every month when you login and make your payment. Make your password something secure to prevent tomfoolery. Do not use the same password you use for Trygar Transportation.
Second, when filling out your last name, make sure it's identical to what's on the credit card you will be later attaching to your account. PayPal does not allow you to change your last name later when adding credit cards and bank accounts. This is a security measure. So the moral is, you can only link accounts that share the same last name as the one you used when you signed up. Got it?
Finally, don't forget to check the button that says you agree to their terms and service. It's annoying when you have to re-fill in forms because you forgot to check a small box.
When you've submitted your personal info, move on with the tutorial.
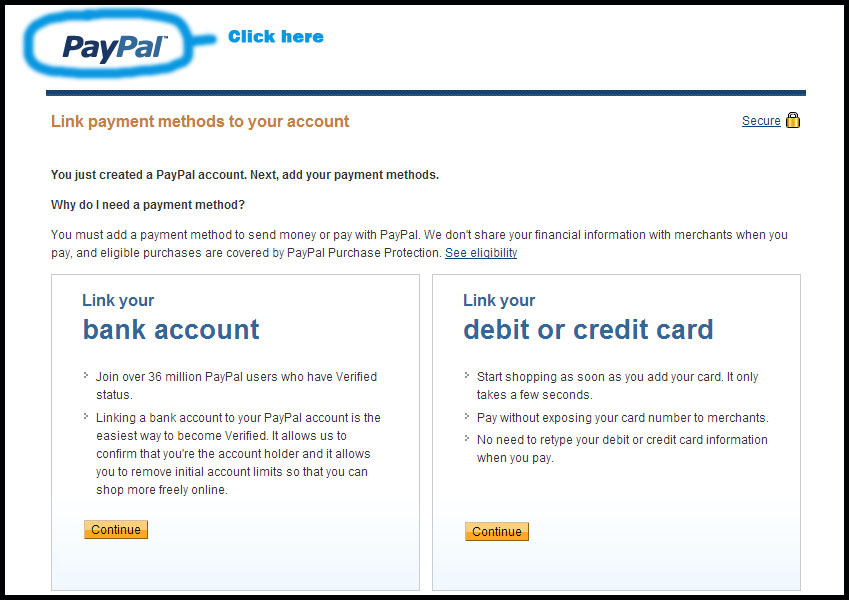 You may want to consult the image to your left to make sure it matches what you are seeing now. At this point, we can link our credit card (or bank account), but we're going to hold off on that for now. Instead, click the PayPal logo in the upper left corner as shown in the image. This will take you to your PayPal account panel, also known as your main hub for doing anything in PayPal.
When you are done glancing around your home screen, move on to the next step.
 We have a couple of images to go along with this step. Let's look at the first one. As you can see in the image, we are at our home screen and we are looking for a link on the right side of the screen that says, "Confirm E-mail Address". Once you find it, click it. PayPal must confirm your email address before you can send or receive money to your account. Don't worry, it's easy.
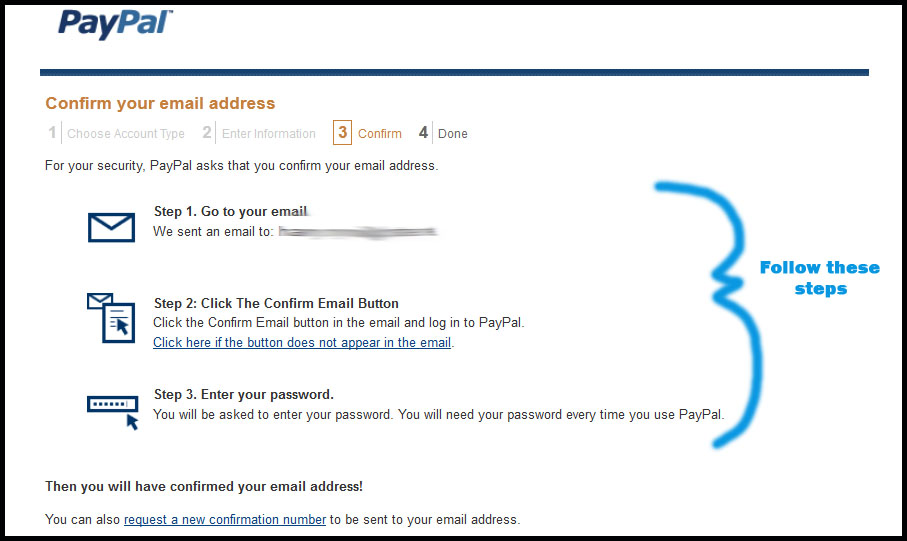 Looking at the second image, you'll see you are given steps on how to confirm your email account. It seems painless enough. So go ahead and do that and move on with the tutorial when you're ready.
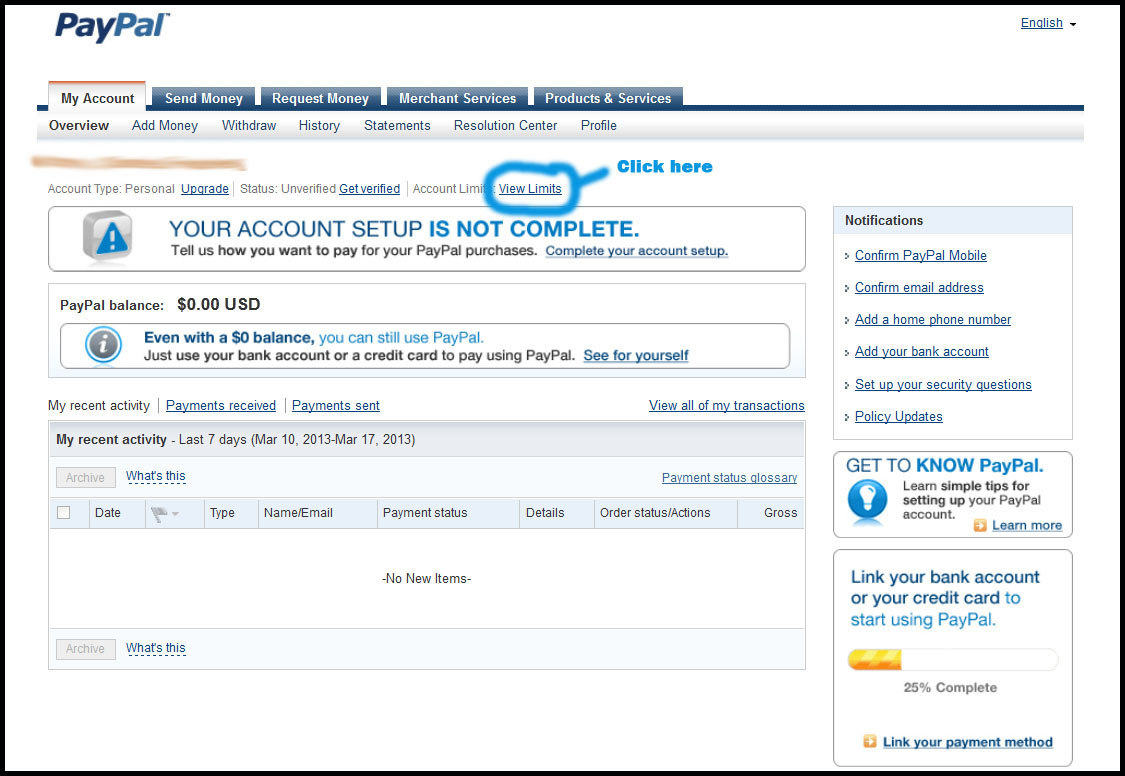 Again we have a couple of images to go along with this step. Let's start with the first one. After confirming your email in the previous step, it should have brought you back to your PayPal home screen. If not, you can always click the PayPal logo in the upper left corner of the screen to take you there. Looking at the first image, you'll see we're showing the home screen and directing you to a link called "View Limits". Find that link on your home screen and then move on to the next picture in this step.
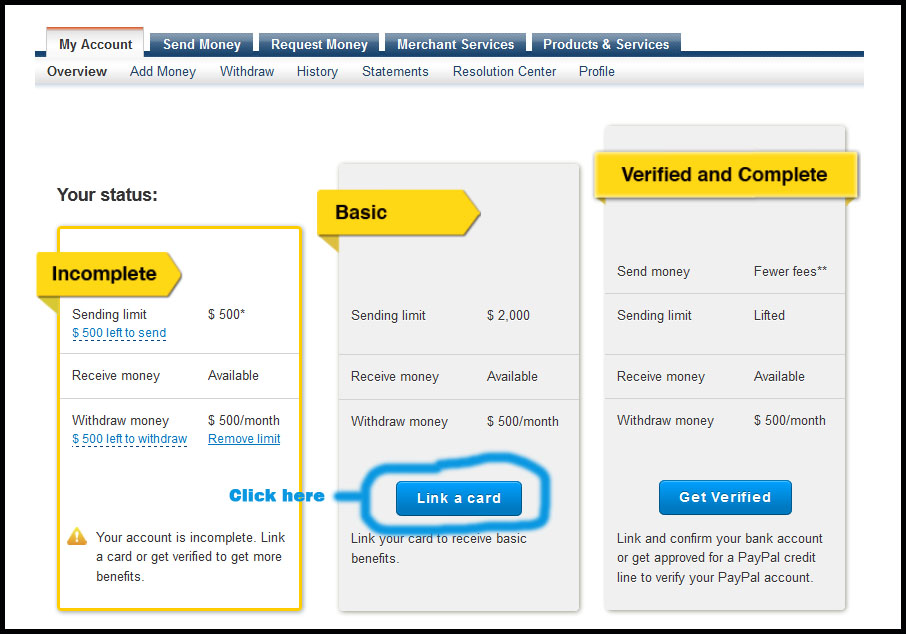 This second image shows you what your View Limits screen is about. Basically, you have a decision to make. There are 3 levels of membership (all free). Unverified, Basic and Verified. Since you'll shortly be attaching a debit card, you'll have at least a Basic membership when we're done. The important thing to note is that with a Basic, you can send a max of $2000 dollars total before you have to be Verified. So depending on your monthly payments, this could stretch quite a while. When you hit your max you can become Verified or simply resort to using a guest account every month.
So how do you become Verified? You simply attach your personal bank account. You can still use your credit card solely to make payments, but they just like to have it on file as a fallback. Becoming Verified is quick and painless and most importantly, safe and secure. It's a good way to go if you have the option and willingness. And it won't cost you anything. But it's not required. It's simply your choice.
One final thing before we move on to the next step. Looking at the second image on this tutorial step, you'll see we're directing you to the button that will take you to linking your debit card and becoming a Basic member. Almost done!
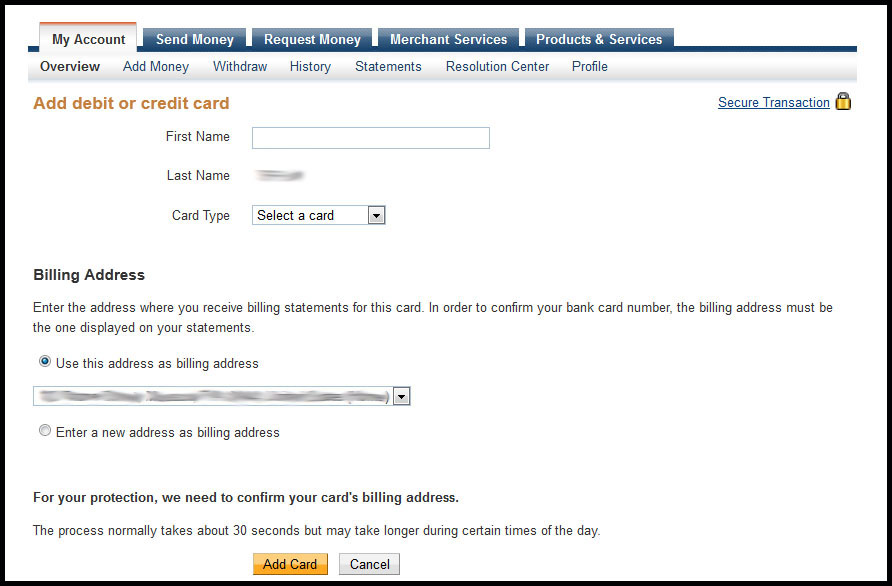 This step is pretty straight forward. Just enter your debit card information from the cards you were issued to make your monthly payments. Once this is done, every time you visit Trygar Transportation and check your account page, you can easily make your payment by simply filling in the little PayPal payment box. PayPal will do the rest since it already has your info. Handy, right?
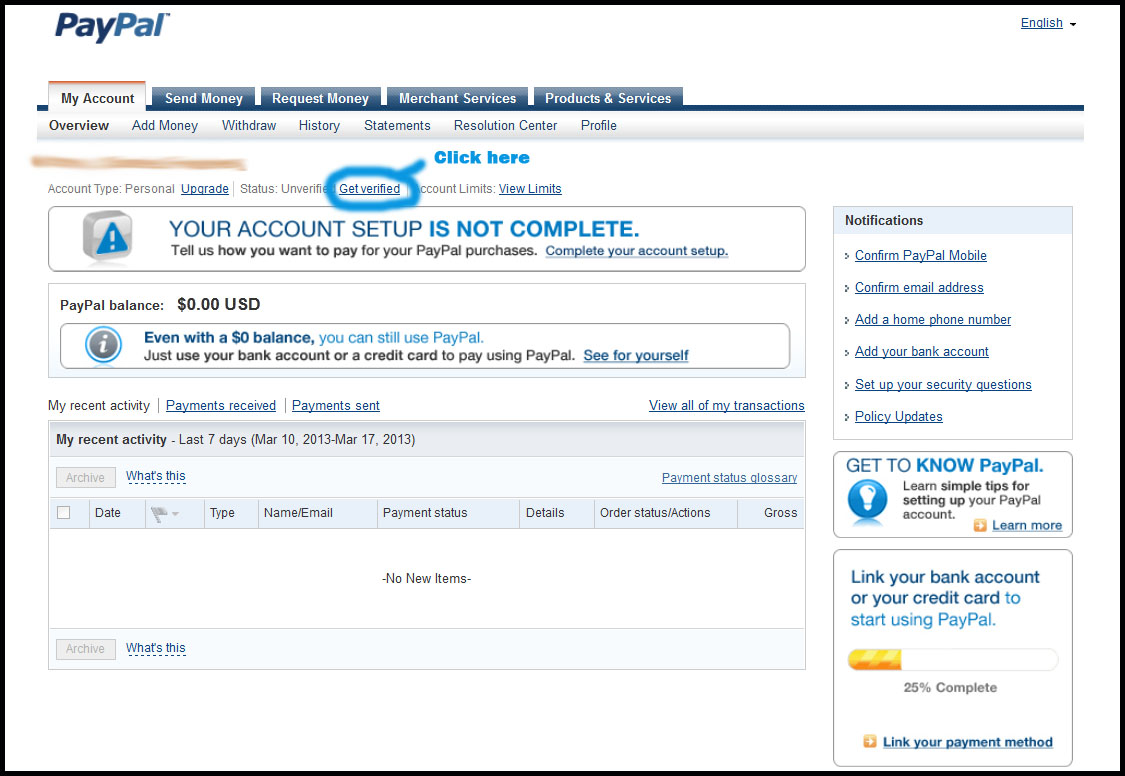 If you decide you want to verify your account, use the image to your left to help you find the link on your home screen. For the sake of this tutorial we won't go through the process of getting Verified. But trust us, it's really really easy.
There's more you can explore in your new account but that can be for another time. We have gotten you to the point where you can make your payments easily. Good luck and if you have any issues at all, please contact Trygar Transportation. Thanks for reading!